SETTING UP YOUR CRM
(Please Go Through All The Steps To Ensure Your CRM Is Good To Go)
IMPORTANT NOTE:
You must have a website to be approved. Do not use a facebook page, a domain with no website, etc.
If you already have a website, click here and review the article about A2P website requirements before registering.
If you have a domain, but need a website, click here to review the article going over how to connect your domain to REI Closed.
If you don't have a domain, and you'd like to use an REI Closed domain (yourbusiness.reiclosed.com), click here and fill out the form. Please wait for us to setup your domain prior to registering if you're using an REI Closed domain.
If you don't have an EIN, and are registering as a sole proprietor, click here to review the article about how to register as a sole proprietor.
Complete Your Business Profile
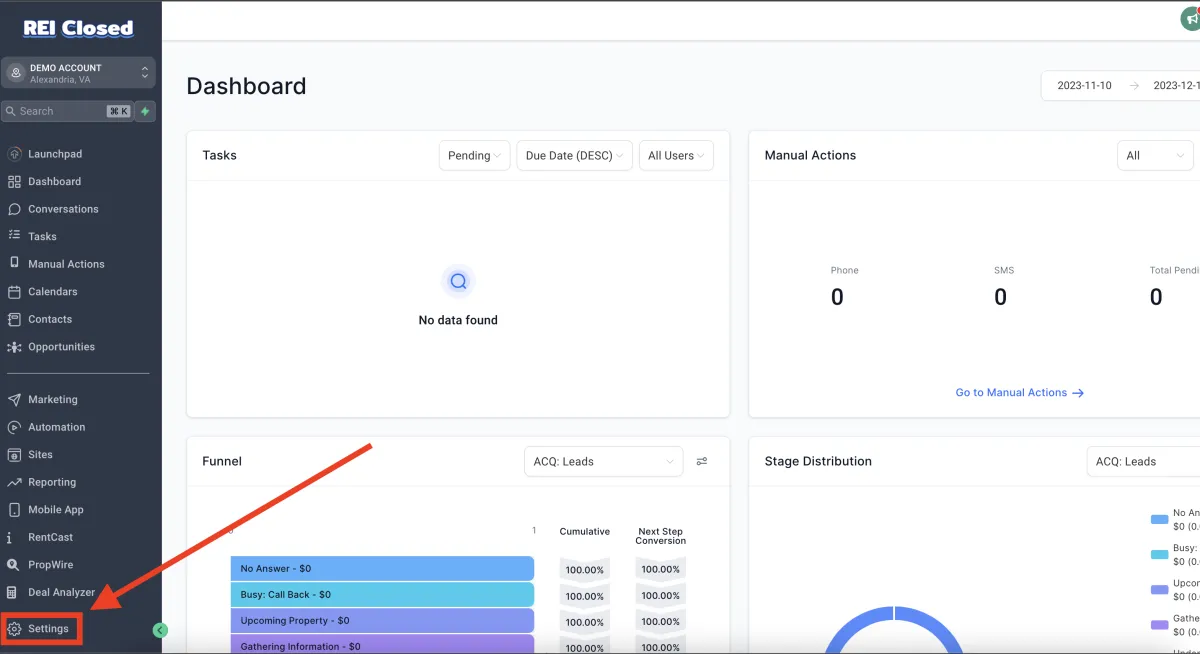
Step 1: Go To Business Settings
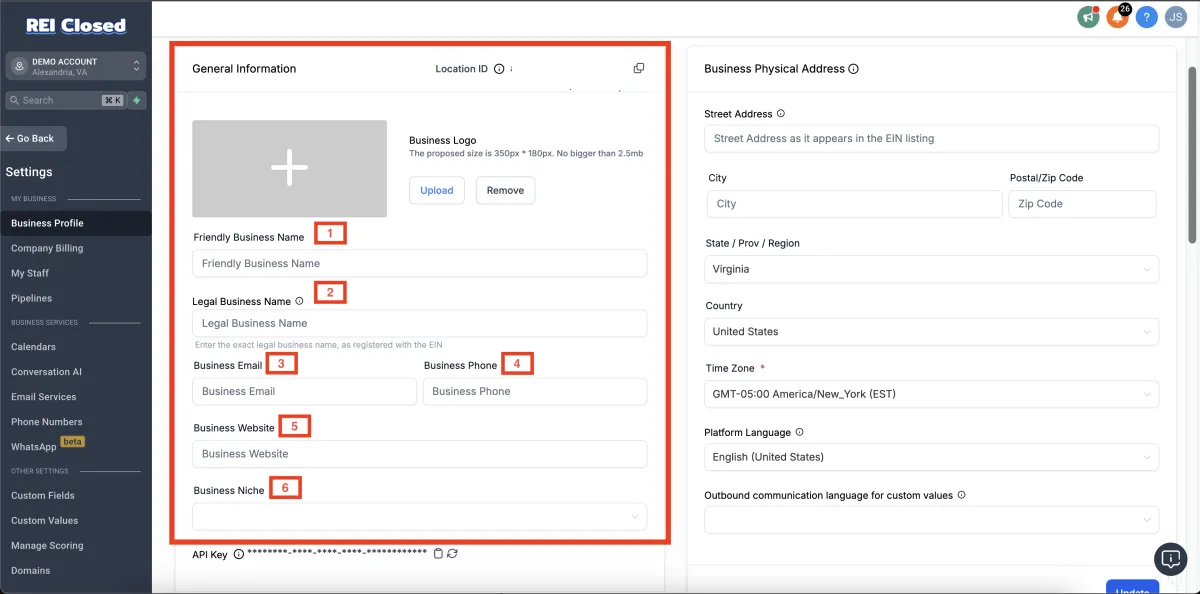
Step 2: Fill Out General Information
Friendly Business Name
You can set a username for each of your sub-accounts here.
Legal Business Name
This is where you enter your exact legal business name, as it is been registered with the EIN because this data will be used for future compliance registration.
Business Email
Type in here your official business email address.
Business Phone
Type in here your official business phone number.
Business Website
You can type in your business website here.
(If you don't have one, we recommend buying a domain name from GoDaddy, BlueHost, etc. and using one of our premade templates, or creating your own website. It will enhance credibility, but will also boost the chance your account will pass for A2P 10DLC registration.
Business Niche
You select the niche your business belongs to.
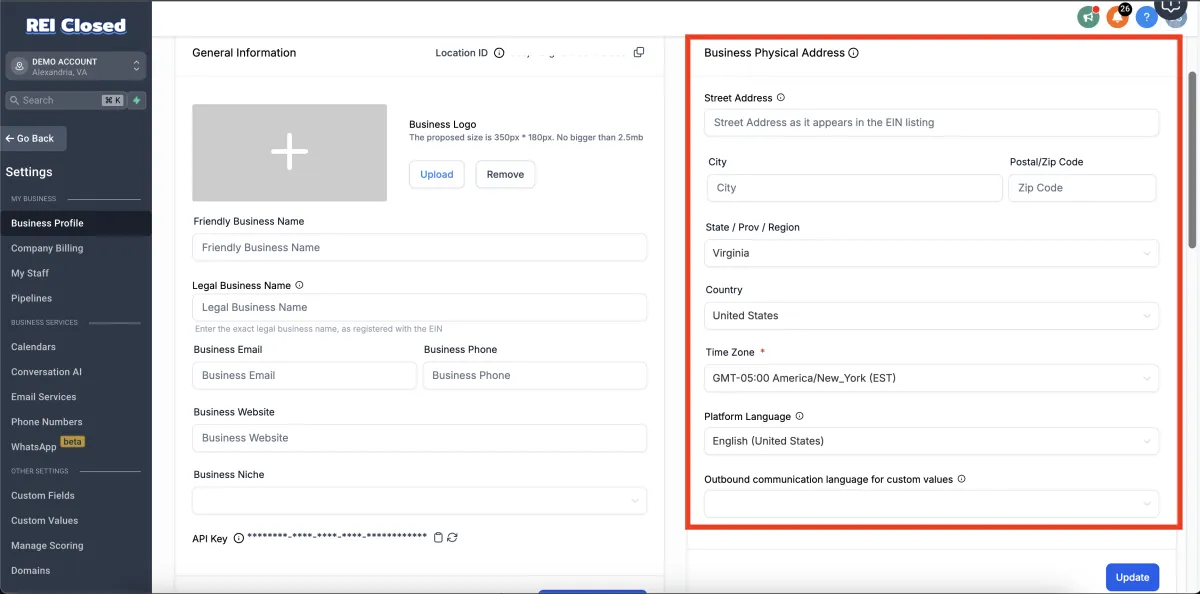
Step 3: Fill Out Business Physical Address
Here you can type in the full Walk-in address for your business. You must enter the exact business address as it appears in the EIN listing; your full street, city, postal/zip code, state/Prov/Region, and country.
You are also required to include your time zone. Changing the time zone will impact your triggers, appointment booking, and more. Lastly, select your preferred language, the selected language will be used by the system as default.
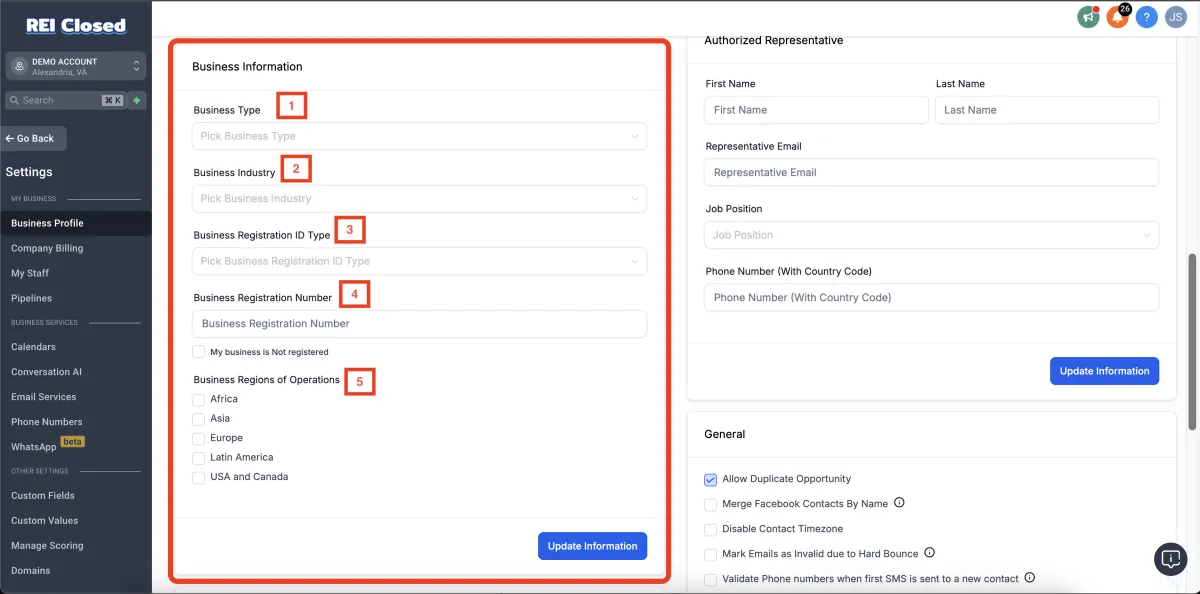
Step 4: Fill Out Business Information
Business Type
You can select the type of business you run; either a Sole proprietorship, Partnership, LLC, Co-operative, or non-profit Corporation.
Business Industry
Select the industry category your company belongs to.
Business Registration ID Type
Select the Government ID you would like to use in registering your company.
Business Registration Number
Type in your company's Registration number here. If your business is not yet registered, tick the My business is Not registered instead
Business Regions of Operation
Select the region in which your company is located. You can select more than one option if your company has branches in other regions outside your headquarters location.
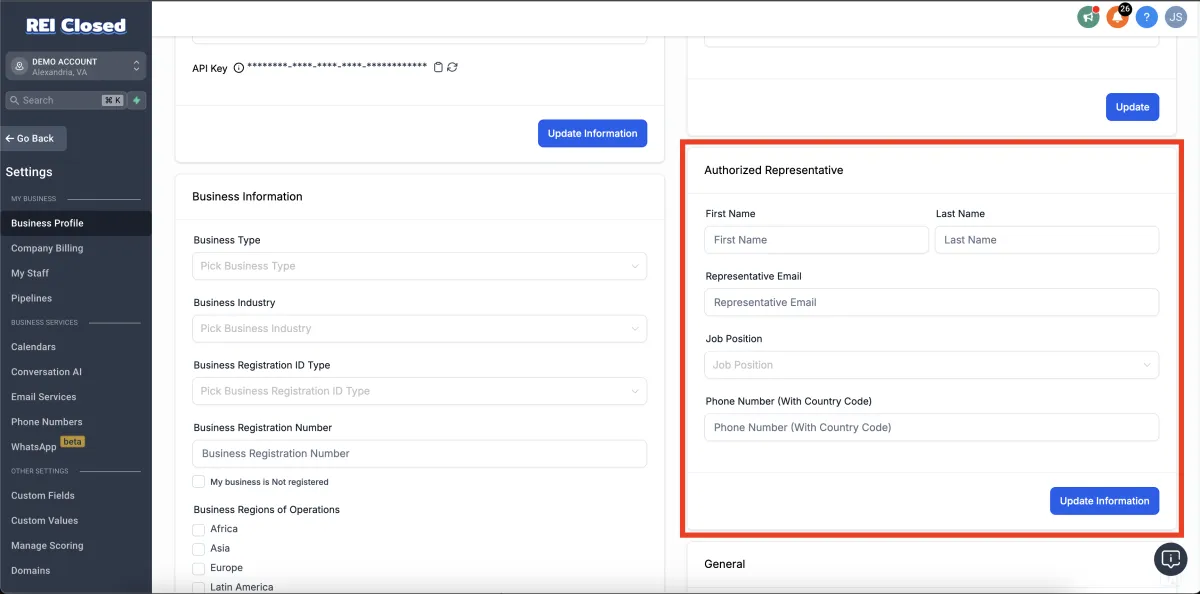
Step 5: Fill Out Authorized Representative
The Authorized Representative, or the owner of the account, will go here. Type in the person's First & Last name, Email, Job position in your company, and his/her phone number with the country code.
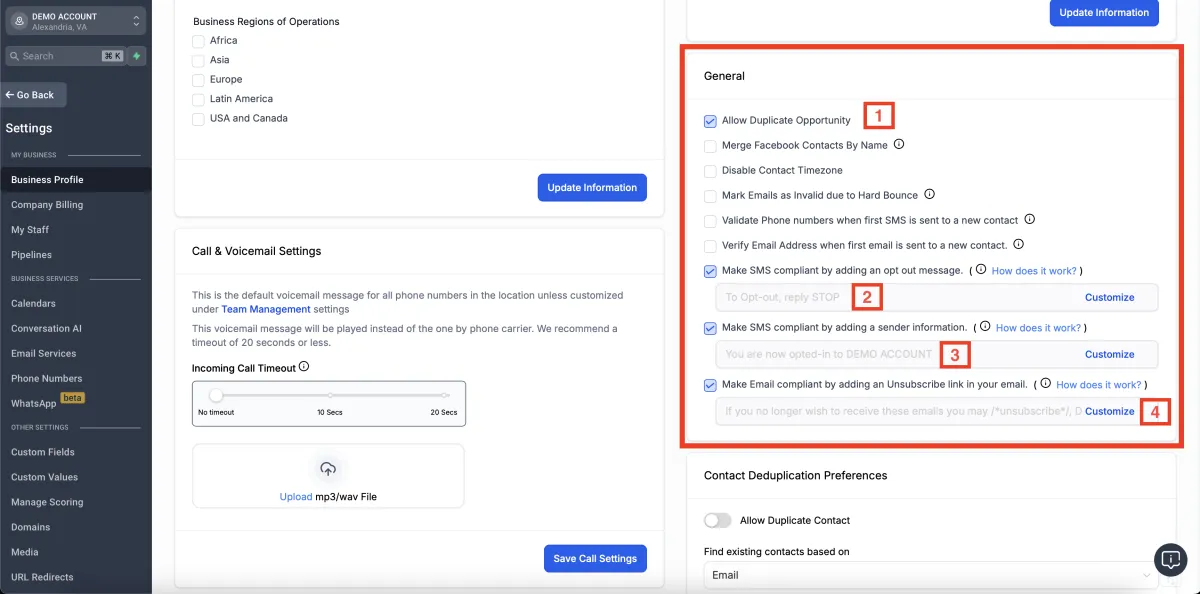
Step 6: Opt-in / Opt-out Compliance
Check this box while we're here. This isn't related to compliance, but if you're working with agents or wholesalers, you'll likely get multiple opportunities from them and will need to check this to allow more than one opportunity per contact.
Make SMS compliant by adding an opt-out message - If activated, the opt-out message will be automatically added to the first SMS that's sent via Bulk Messages to ensure compliance and increase delivery rates.
You can customize your message here by clicking on the "Customize" button and editing it, For example; "Reply STOP to Unsubscribe".
The initial message that you send to an individual needs to include one of the following standard opt-out keywords: STOP, STOP ALL, UNSUBSCRIBE, CANCEL, END, or QUIT.
Make SMS compliant by adding sender information - This Messaging Policy applies to SMS and MMS messaging channels through all the flows available in LeadConnector. It allows contacts to receive messages unhindered by filtering or other blockers. If activated, the sender information will be automatically added to the first SMS message of any Bulk Messages to ensure compliance and increase the delivery rate.
When customizing, you can edit the Sender ID. If you want to send an initial message to an individual instead of a bulk message, make sure you include the sender's ID info in the 'Business Name' text box in the General info section.
You can also decide the position of the signature message; either that the beginning or at the end of the message.
Make Email compliant by adding an Unsubscribe link in your email - It will allow recipients to opt-out from receiving any email newsletters for your products or services. Maintaining a clean email list is imperative for email deliverability, and adding an unsubscribe link in the email footer is always the best practice.
When customizing, you can edit the Sender ID. If you want to send an initial message to an individual instead of a bulk message, make sure you include the sender's ID info in the 'Business Name' text box in the General info section.
You can also decide the position of the signature message; either that the beginning or at the end of the message.

© Copyright 2023 - REI Closed LLC. All rights reserved